Getting Started with Kubernetes
Kubernetes-- also known as k8s--helps you run your software in containers so it works consistently every time, without worrying about setup. It makes it easier to launch apps, tools, or workflows on demand and manage resources automatically. For HPC users, it’s a simple way to run flexible or interactive workloads alongside traditional batch jobs.
Research Computing's Kubernetes offering is currently on a limited basis as well roll out and test the functionality. If you are interested in using Kubernetes, please submit a ticket re: Gil Speyer.
This document will guide you through the following steps:
- creation of k8s credentials in the user portal
- placement of credentials on your workstation
- installing the k8s client applications on your workstation
- deploying k8s resources
- adding persistent storage
Setting up your workstation for k8s
The preferred way to use Kubernetes is to install the kube client application on your workstation, giving you direct access to the terminal and administrative functions of k8s.
k8s credentials from user portal
- Visit the user portal and click on 'My Profile'
- Along the 'My Profile' tabs (Overview, Storage, etc.), click 'k8s Access'
- Generate your user credential that authorizes your workstation
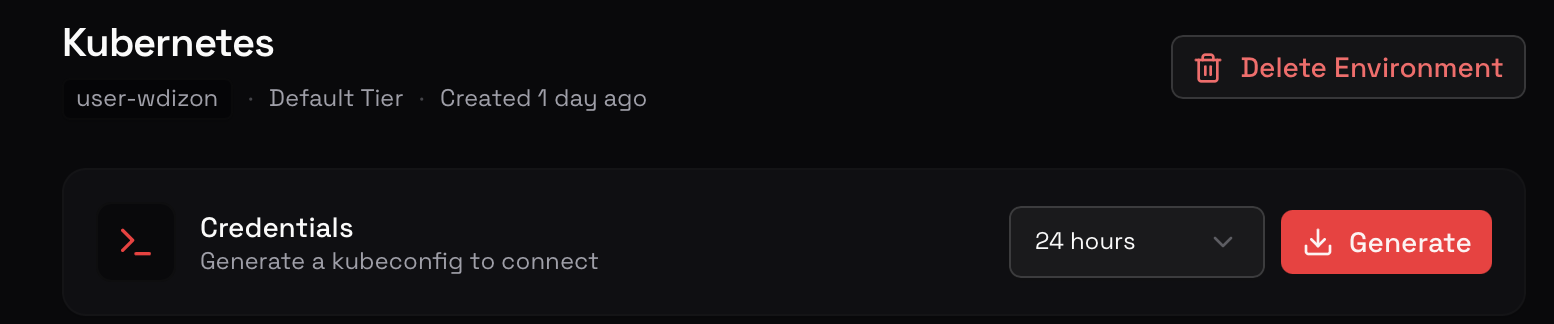
- Click
downloadto save the credential to your workstation.
Placing credentials
Now that your credentials are on your workstation, we can place it in the default location that the client application uses.
- Linux
- OSX (Mac)
mkdir -p ~/.kube
mv <path_to_downloaded_file> ~/.kube/config
mkdir -p ~/.kube
mv <path_to_downloaded_file> ~/.kube/config
Downloading the k8s client applications
- Linux
- OSX (Mac)
curl -LO "https://dl.k8s.io/release/$(curl -L -s https://dl.k8s.io/release/stable.txt)/bin/linux/amd64/kubectl"
chmod +x kubectl
mv kubectl ~/.local/bin/
This moves kubectl into your local binary directory, which is customarily in your $PATH directory. This means you should be able to invoke it from any directory via kubectl.
brew install kubectl
Verifying your client application connectivity
Finally, verify kubectl can identify your credentials and reach the k8s server.
$ kubectl get pods
No resources found in user-rcsparky namespace.
It is expected to see no resources listed here: requesting and allocating comes next!
Deploying k8s resources
- From the user portal, under
k8s Access, clickDeploy & Workloads - Click on the card
Browse Templates - Choose a preconfigured template, e.g.,
Hello World - Review the k8s configuration, which includes port connectivity, container image, pod counts.
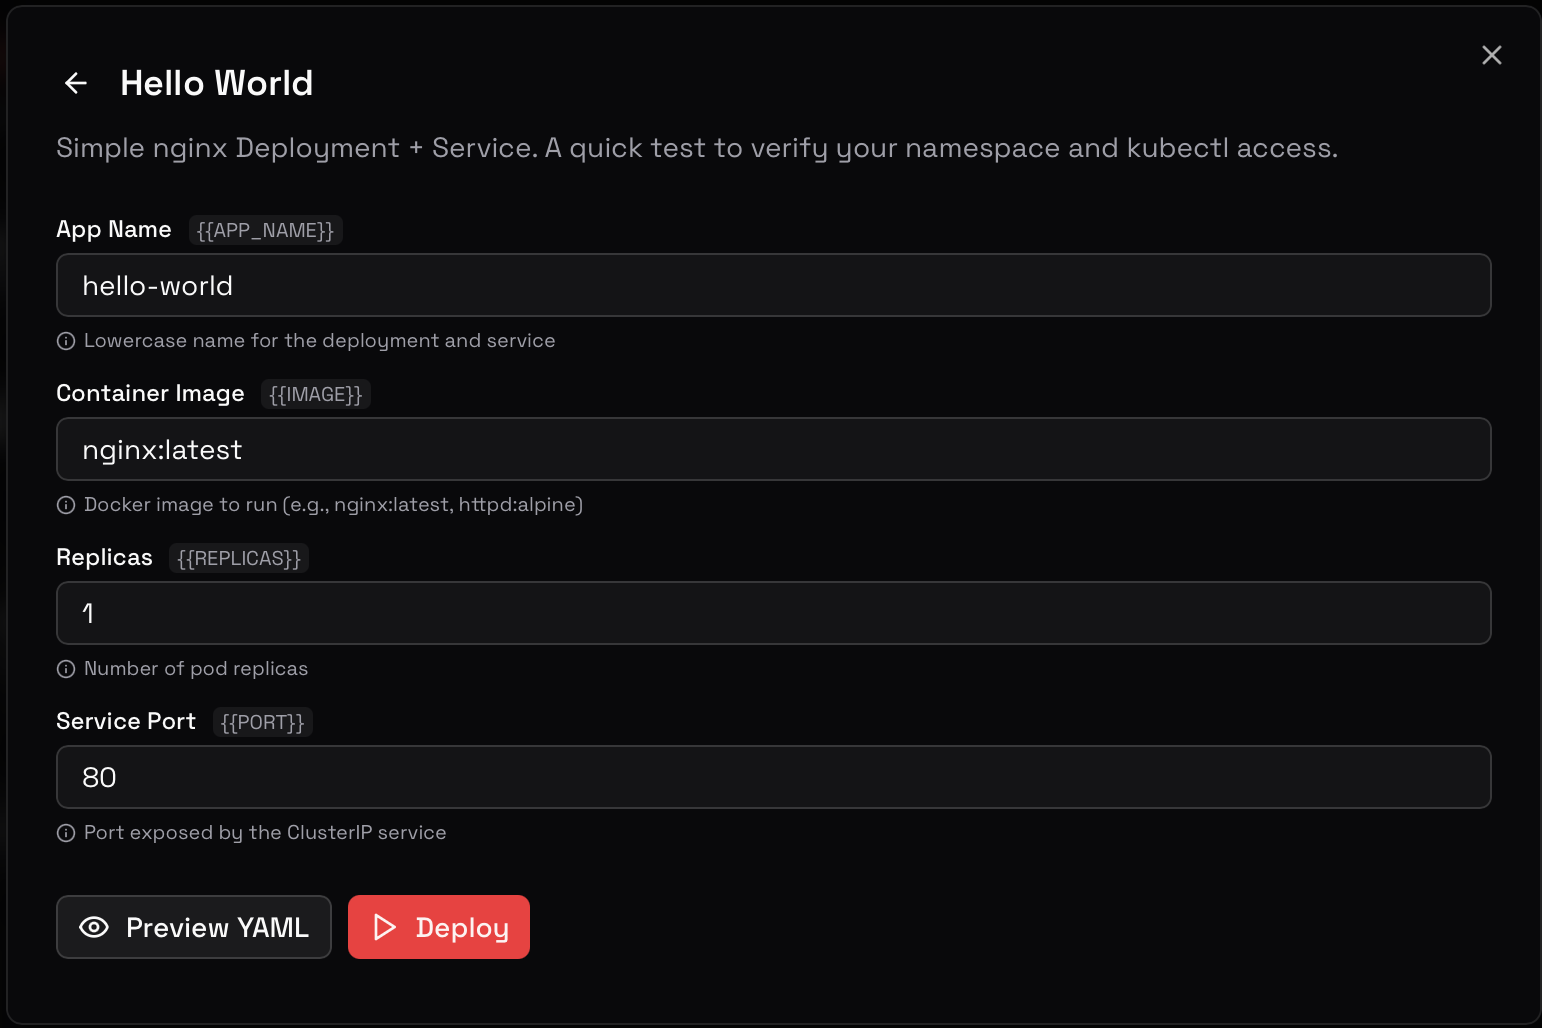
- Click
Deployto provision the hosts - You will now see the host show up in
DeploymentsandActive Pods
Connecting to the resources
- From your workstation, identify the newly created pod:
$ kubectl get pods
NAME                                READY   STATUS    RESTARTS   AGE
hello-worldasaur-595cd7f897-jxhkx   1/1     Running   0          88s
- Connect to the pod
$ kubectl exec -it hello-worldasaur-595cd7f897-jxhkx -- sh
# uname -a
Linux hello-worldasaur-595cd7f897-jxhkx 6.12.0-124.38.1.el10_1.x86_64 #1 SMP PREEMPT_DYNAMIC Mon Feb 23 12:38:35 UTC 2026 x86_64 GNU/Linux
#
From here, you have full root access to the container, package managers--complete access to all your k8s systems!
Adding persistent storage
k8s hosts will have access to your normal /home and /data directories, giving you a place to bring in your input and output files.
There will be multiple use-cases, too, where you want to have persistent storage that is specific to the host, instead. For this, use Persistent Volumes under the Storage & Config tab.
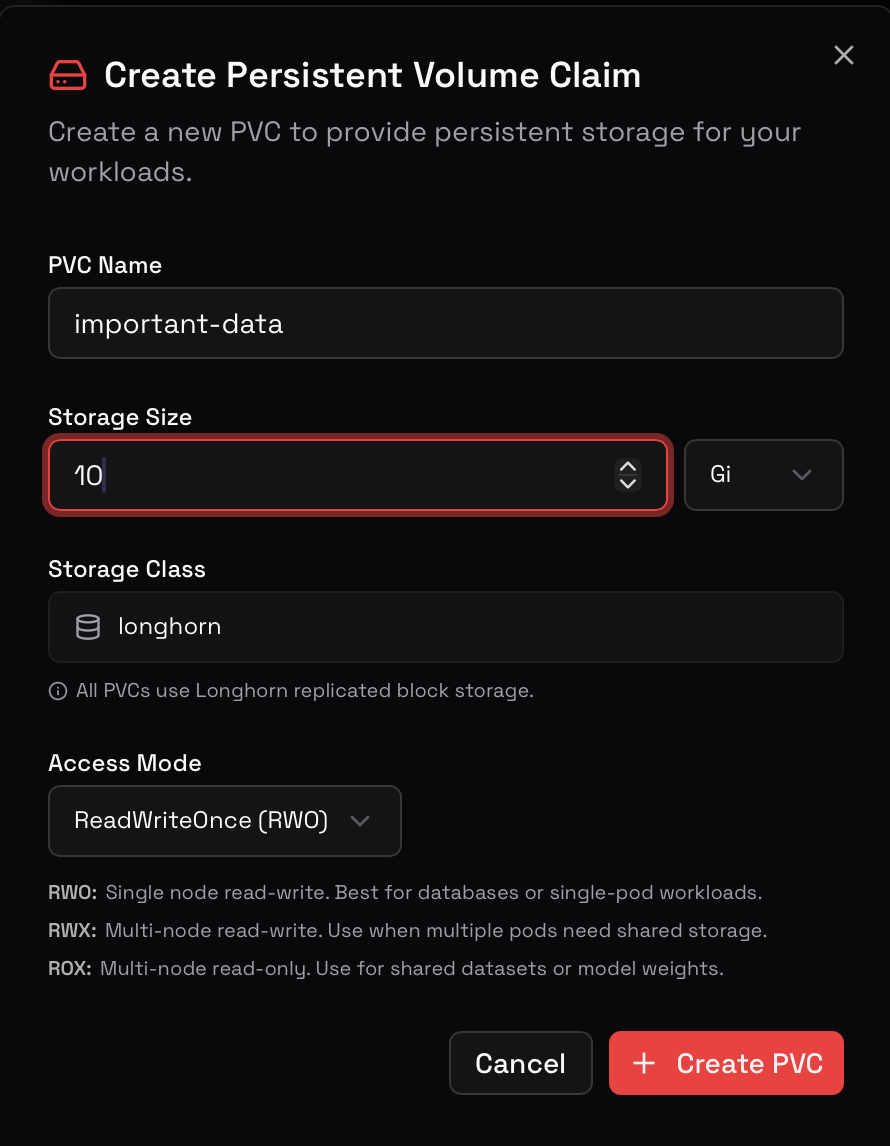
Attaching storage to pod
It is often easier to create storage before creating the deployment, so that you may attach the persistent volume at creation time. This is not required, but makes it more straightforward what will be available at startup.
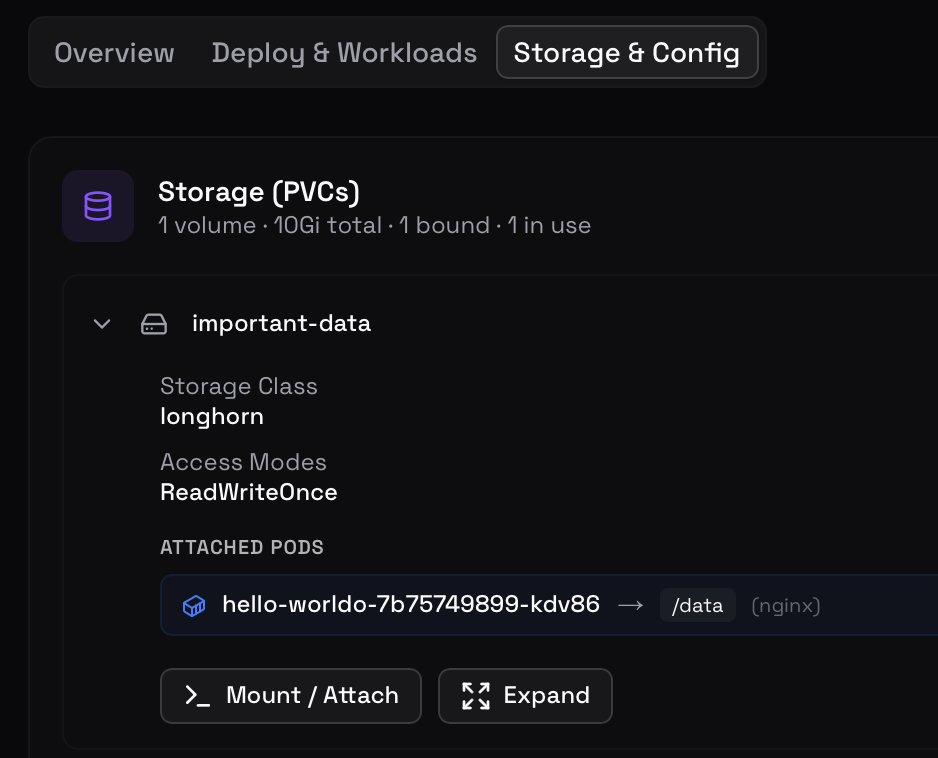
To see the YAML configuration required for attaching your storage, click on Storage & Config and expand your storage. At the bottom of the tile you should see a button Mount/Attach which will provide you the actual YAML code required for setup.
Copy this into your existing or a new YAML configuration, being mindful to line up the attributes properly:
volumeMounts: is a child attribute to spec/containers/<app>
volumes: is a sibling attribute to containers:
    spec:
      containers:
        - name: app
          image: my-image:latest
          volumeMounts:
            - name: important-data-vol
              mountPath: /data
      volumes:
        - name: important-data-vol
          persistentVolumeClaim:
            claimName: important-data
Verify attached storage in host
Demonstrate the mount succeeded:
# mount | grep data
/dev/longhorn/pvc-774613ec-bfd8-48a4-b172-d8fc58d0ae4c on /data type ext4 (rw,relatime)
Enter the mount and list its contents:
# cd /data
# ls -la
total 21
drwxr-xr-x 3 root root  4096 Mar 26 18:59 .
drwxr-xr-x 1 root root     6 Mar 26 18:59 ..
drwx------ 2 root root 16384 Mar 26 18:59 lost+found
#