A Brief Example
Step 1 - Search
Example packages used for this tutorial are: multiqc and tensorflow. Step 1 is about finding multiqc. Step 4 will cover tensorflow.
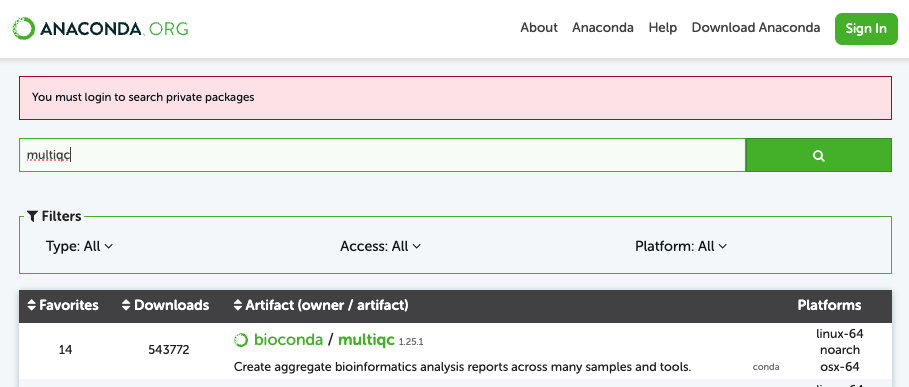
Go to anaconda.org and search for multiqc in the search bar:

Click on one of the search results, usually the first one from bioconda/multiqc:
Exam the details on the following page, especially the version of the package:
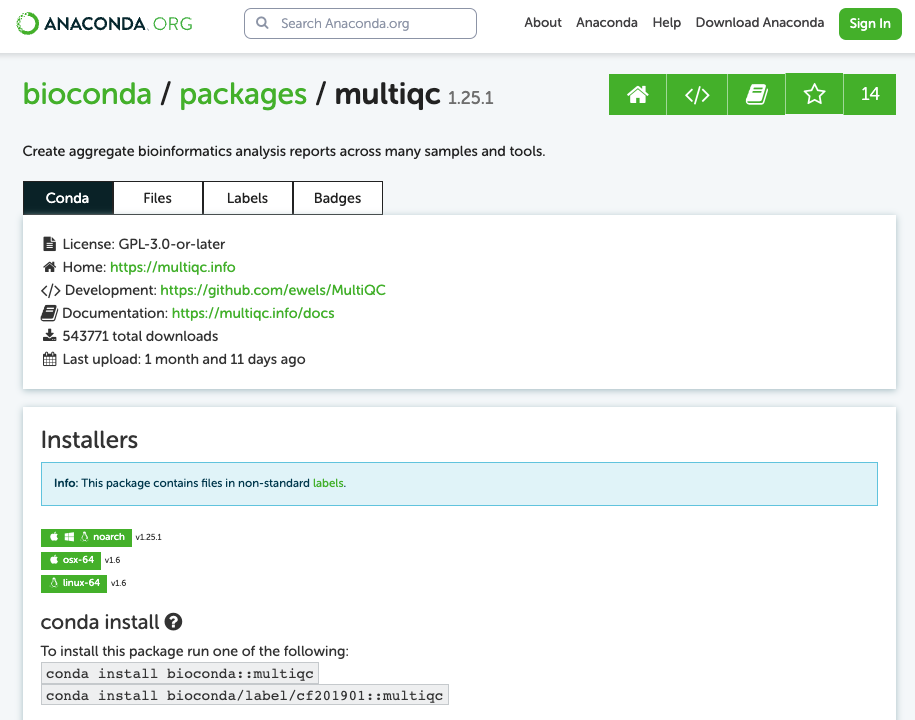
The "conda install" on the above page gives the installation commands:
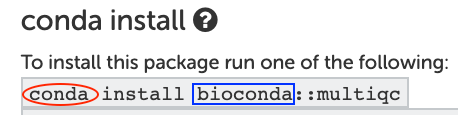
The conda part in the red circle needs to be changed to mamba, and the bioconda part in the blue box is the channel name of this multiqc package. Channel is similar to the name of an online folder, that mamba can find and download the correct package. This is important for the next step.
The command given here CANNOT be directly used on ASU supercomputers, the sections below will show you how to produce a correct install command.
Step 2 - Install
-
Connect to the VPN
-
Open a command line interface on Sol by navigating to sol.asu.edu on your browser and selecting the "Sol Shell Access" option from the "System" menu option. Or by SSHing into Sol using the command
ssh <asurite>@sol.asu.edu -
interactive -p htc -c 4 -t 30 -
module load mamba/latest -
If the package is for running codes on GPUs, a compatible
cudamodule is also needed. -
Now we are ready to create env and install packages. It can be done in separated commands, but the fastest way is to do it in a single command, here is how:
a. Slower way: i. Create an environment:
mamba create -n myENV -c conda-forge python=3
source activate myENV
ii. Install Multiqc using the command found in step 1
mamba install -c bioconda multiqcb. Faster way: Combine commands from above into the a single command:
mamba create -n myENV -c conda-forge -c bioconda python=3 multiqc -
And answer Y to the promoted question, if everything looks fine
-
Wait till the installation finish
The -c flag in the above command means "channel". The channel name must be correct to install the correct package. More information can be found here: Managing Python Modules Through the Mamba Environment Manager
Step 3 - Use / Test
Once the myENV environment is ready, multiqc can be used directly or within a python session/script. Below is for using it in the shell, which is also a good testing method for newly built env.
-
Connect to the VPN
-
Open a command line interface on Sol by navigating to sol.asu.edu on your browser and selecting the "Sol Shell Access" option from the "System" menu option. Or by SSHing into Sol using the command
ssh <asurite>@sol.asu.edu -
interactive -p htc -c 4 -t 30 -
module load mamba/latest -
source activate myENV -
python -
import multiqc
Step 4 - What about pip?
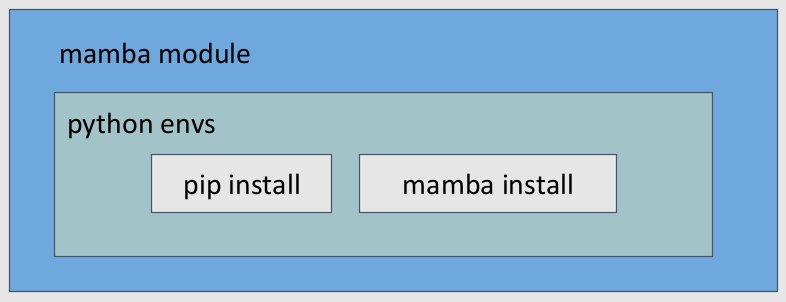
As explained in Python Package Installation Method Comparison, the only correct way to use pip on the ASU supercomputers at the moment, is to use it inside an activated mamba env.
There are some packages can only be found on pypi.org but not anaconda.org, then the only option to install them is via pip, inside an activated mamba env. Notably that the current official installation guide for both tensorflow and others prefers pip.
Here we take tensorflow as an example. We will need to modify the instructions found on their official document to make it work on Sol:
-
Connect to the VPN
-
Open a command line interface on Sol by navigating to sol.asu.edu on your browser and selecting the "Sol Shell Access" option from the "System" menu option. Or by SSHing into Sol using the command
ssh <asurite>@sol.asu.edu -
interactive -p htc -c 4 -t 30 -
module load mamba/latest -
Since we are on a CPU compute node right now, we need CUDA drivers so the env we are making can used GPU nodes in the future. That means we need a CUDA module:
module load cuda-12.6.1-gcc-12.1.0 -
Now we need to go inside an env. Two options here: a. If you have an existing env:
source activate myENVb. If you want to build a new env:mamba create -n myENV -c conda-forge python=3.12
source activate myENV -
pip install tensorflow[and-cuda]
Step 5 - Jupyter Notebook
After multiqc and tensorflow have been installed to myENV, we want to use this mamba env in the Jupyter Notebook session on the Sol web portal. So we need to make a Jupyter kernel from this mamba env. More details are covered in Preparing Python Environments for Jupyter and here are the example steps:
-
Connect to the VPN
-
Open a command line interface on Sol by navigating to sol.asu.edu on your browser and selecting the "Sol Shell Access" option from the "System" menu option. Or by SSHing into Sol using the command
ssh <asurite>@sol.asu.edu -
interactive -p htc -c 4 -t 30 -
module load mamba/latest -
Create a jupyter kernel, note that you don't need to activate any environment.
mkjupy myENV "myENV_kernel" -
Find and use
myENV_kernela. Log in to the Sol web portal
b. On the top bar: Interactive Apps > Jupyter > Fill out request form > Connect to Jupyter
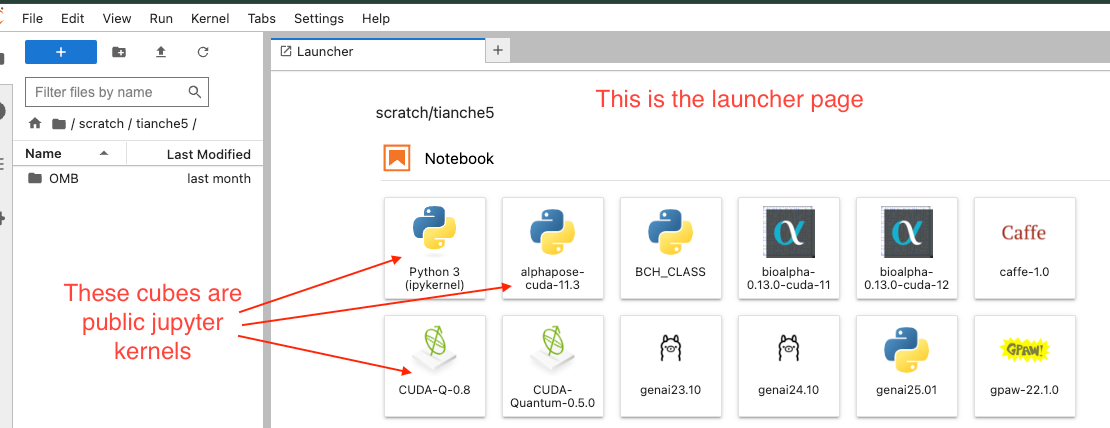
c. Inside the Jupyter Notebook: Open a Launcher page > Click onmyENV_kernelicon. It usually shows up as the first cube, in front of the public kernels:
Once a jupyter kernel is made, it cannot be modified. So if you need to add more packages later, the correct method is:
- Open a shell/terminal to access Sol or Phx
- Add the packages to the existing mamba env
- Recreate the jupyter kernel using the
mkjupycommand. You can use a new name if you want to keep the old kernel. - Launch a new jupyter session on the Web Portal, and look for this new kernel.
Additional Help
If you require further assistance, contact the Research Computing Team:
- Ticket-based support via RTO Request Help Portal.
- Slack support via the #rc-support channel in the ASU Research Computing workspace.
- Weekly office hours for one-on-one assistance.
We also offer Educational Opportunities and Workshops.