Preparing Python Environments for Jupyter
Overview
This article describes adding your mamba environments to Jupyter Notebook to use as a kernel. You can learn about creating mamba environments in Managing Python Modules Through the Mamba Environment Manager.
Use the Public Kernels
The public jupyter kernel can be directly used without installation. They are generated from the public mamba environments. Everyone can use them, but they cannot be modified (e.g., adding packages). Here are two ways to find them inside the jupyter session on the web portal:
The first option: initiate a new notebook directly
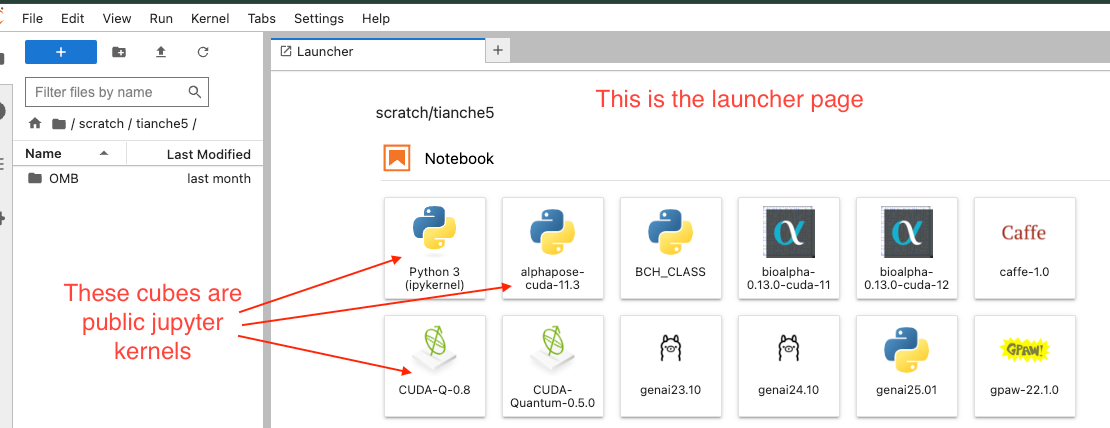
This is the launcher page where you can see all available public jupyter kernels represented as cubes. These include various Python environments with different configurations (e.g., Python 3, tensorflow-cuda, BCH_CLASS, bioalpha, etc.).
The second option: choose a kernel for an existing notebook file
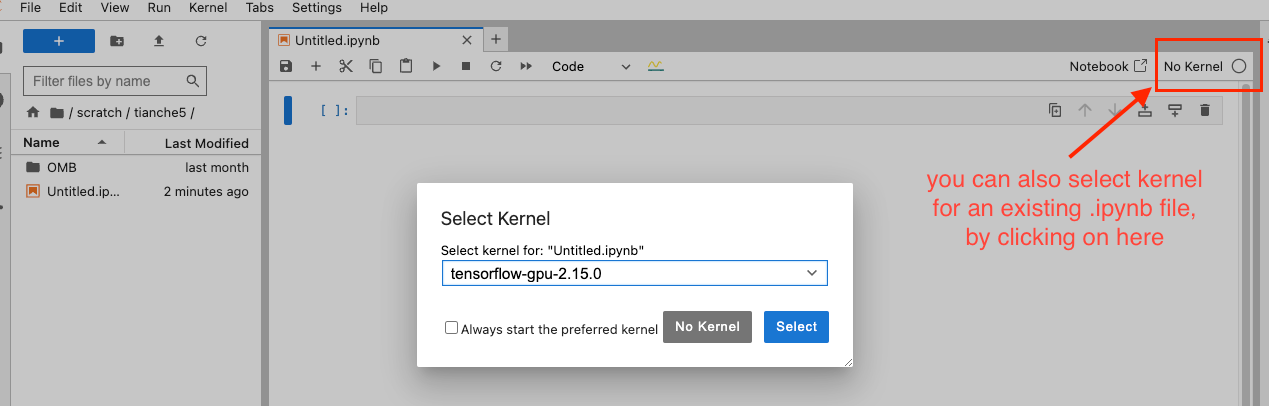
You can also select a kernel for an existing .ipynb file by clicking on the kernel selector in the top right corner of your notebook. This allows you to switch between different kernels even after creating your notebook.
- First image shows the launcher page with various public jupyter kernels displayed as cubes
- Second image demonstrates how to select a kernel for an existing notebook by clicking the kernel selector in the top right
Creating Your Own Private Kernel
The following command will create a jupyter kernel from an existing mamba environment:
Do not activate the environment when running this command.
$ mkjupy <environment> "Icon Label"

Example (do not activate the nobel environment):
$ mkjupy nobel "nobel"

Expected output example:
$ Installed kernelspec nobel in /home/sparky/.local/share/jupyter/kernels/nobel
This takes the environment called nobel and creates a Jupyter kernel for it. When creating a new notebook, it will have an Icon labeled nobel on the launcher page.
If you need to add more packages, the steps are:
- Open a shell/terminal, connect to Sol/Phx, request an interactive session
- Load the mamba module, activate the
nobelenvironment - Add packages to the
nobelenvironment - Deactivate the
nobelenvironment - Use the
mkjupycommand again to re-create thenobelkernel
Customizing logos is possible but not currently documented due to potential complexity. If interested, please come by office hours!
Removing a Kernel from the Web App
From the terminal, execute the following commands (once again assuming a fresh shell session). This will only remove the kernel entry in Jupyter and does not affect the environment. Besides the example below, an alternative way is to delete the kernel folder directly.
$ module load mamba/latest
$ jupyter kernelspec remove nobel
Kernel specs to remove:
    nobel               /home/sparky/.local/share/jupyter/kernels/nobel
Remove 1 kernel specs [y/N]: y
[RemoveKernelSpec] Removed /home/sparky/.local/share/jupyter/kernels/nobel
Remove the kernel by the environment name, not the Jupyter kernel title.
Creating Kernels from a Data Directory
Since the command above only works for environments installed in the user's home, to make a kernel from environments installed in /data directory:
-
If needed, re-create the env in this /data directory, then each user in your group can access this env and make a kernel from it.
-
Activate the env
-
Once the env is activated, install "ipykernel" with mamba:
mamba install -c conda-forge ipykernel -
Then each user can make a kernel from this env for themselves: a. They need to activate this env first by
source activate ENVb.python -m ipykernel install --user --name=<exact name of the env>
Known Bug
The older version of the Python package Plotly is known to have some incompatibility issues with Jupyter version 4. Some plotting functions don't work properly inside Jupyter Notebook, for example, the FigureWidget function from Plotly. If encountered, we recommend exploring Matplotlib and Seaborn for your plotting needs. Or you can create your own mamba env and jupyter kernel with a newer Plotly (>= v6.0.1) to get pass this error.
Additional Help
If you require further assistance, contact the Research Computing Team:
- Ticket-based support via RTO Request Help Portal.
- Slack support via the #rc-support channel in the ASU Research Computing workspace.
- Weekly office hours for one-on-one assistance.
We also offer Educational Opportunities and Workshops.